I haven’t had just a whole lot of time since moving to
Illinois to get creative. Paying rent,
bills, groceries and gas leaves my crafts budget something to be desired. Once the job hunt is over and I have a little
spare cash and spare time, I will document some of the crafts on my list to
try; especially, since Hobby Lobby is just a block away. That place is my Mecca.
While planning my wedding last year, however, I was working
on a new craft every few days. I, like
most brides, trolled wedding websites and had seen all of the cute personalized
details and favors. I had stumbled upon
graphic designers who would make your own custom monogram. I browsed the wedding aisles at Michael’s and
Hobby Lobby. I viewed page after page of
Etsy wedding pages. I had a 15 month
engagement, a low budget, and a fiancé living 2 1/2 hours away; the perfect recipe for a DIY wedding. So, I decided to make as many things myself
as time, money and patience would allow.
I even toyed with the idea of sewing my own dress, but I quickly tossed
that out the window.
Out of the many weddings I had been to in the last few
years, the ones that always stuck out in my mind were the ones with lots of
unique little details. Things that kept
me entertained as a guest, things that provided details unique to the bride and
groom and things that showed that the couple put a lot of time and effort into
their day. These are the things I wanted
to emulate. So, because weddings have
been on my mind since last week, here are some of my DIY wedding projects.
.jpg)
Wedding Invitations: I drew some sketches to come up with a design I liked, then browsed the craft stores for materials I liked. The ivory paper was pearlescent and was more expensive, but it was the perfect look I was going for. Since I was doing them myself, I had the extra money to splurge on fancy paper. I designed the text in Word and had it printed, two per sheet, at Fed Ex Office for 10 cents a page. I used a stamp from the craft store with blue and lavender ink for embellishment. The blue paper was scrapbook paper I cut to size and glued to the back of the ivory paper. The map was a little more tricky. I searched my venue on Google Maps then clicked "print screen" and copy pasted the image onto PowerPoint. I then used the line function to draw the roads. I inserted the text for the roads, and then printed these at Fed Ex as well, 4 per page. I printed our address on the back of the envelopes with my printer, but the same look could be achieved with a custom stamp. This is a long process, but oh, so rewarding!
.jpg&description=Hand-made%20invitations "Pin It")

Keepsake Garter and Throw Garter: Again, I designed the basic sketch of what I wanted my garters to look like. I knew I wanted to incorporate my wedding colors, which would cover my "something blue." I bought the lace, ribbon and charm at a fabric store (double check the lace with the dress color if you are worried about it clashing). For the keepsake garter only, I sewed the top lace and bottom lace together to form one thick lace strip. For both garters, I sewed two blue ribbons to the front and back of the lace, stitching along both sides of ribbon to make a channel. I then sewed on the thin lavender ribbon and threaded elastic through the ribbon channel. I cut the elastic so that it was secure around my thigh, but not too tight. I pinned the ends of the elastic together, then stitched the ends of the garter together, right sides facing one another. I turned it right side out, cut the excess, and hand stitched the lavender bow and charm to the front. Ooh la la!


Bubble Tag Instructions: So, I liked the idea of having bubbles blown as we walked back up the aisle after the ceremony. People always clap after the bride and groom kiss and are presented, but after that moment, everyone just sits as they walk back up and music plays. I thought blowing bubbles would be a fun thing to have my guests do to end the ceremony (and it made for some great pictures!). I also wanted bubbles for our first dance, but I didn't want to rent a machine. I ordered nearly 200 wedding bubbles from TheKnot.com, pearlescent paper (matching my invites) and blue and lavender sheer ribbon. I typed up instructions for the bubbles which read:
"After the ceremony we'll walk back up the aisle,
So blow some bubbles to make us smile.
The party is waiting so blow them fast!
You don’t want to miss us gliding past."
"To fill the air with a little romance
Blow these bubbles during our first dance.
Be part of that dance in a special way,
Blow these bubbles as our song plays."
I typed these up, the first on the front, the second on the back, spaced them out and cut them out using a cutting board. Then I punched a hole in each one, cut all the ribbons to roughly the same size and tied each tag to the bubble wand with the ribbon. In the picture, they are displayed in an old hat box my mom had which worked perfectly for the bubbles and the programs (which I also made myself).


Alternative Guest Book Ideas: So, this isn't actually a craft, but I figured I'd mention the other options for guest signatures and well wishes. I've seen several alternatives: the thumbprint tree, the sign-a-wine-cork, the ceramic platter, the quilt squares; all great ideas! This one was my favorite because it is classic, simple, and easily displayed (it is hanging above my couch where I am sitting as I type). They are available at Hobby Lobby for around $30-$40, but you can wait till they are on sale, or use the 40% off online coupon. Print an engagement pic of you and your man, buy a couple of fine tip Sharpies and BOOM! Guest signature wall hanging.


Hanging Mason Jars: I had seen this done before, but my florist actually gave me the tip on how to wrap the wire yourself. Simply wrap medium gauge wire (16 gauge is what I used) around the mouth of the jar once. Twist closed. Arch the wire as high as you'd like then bend it down back to the mouth. Thread it under the circle of wire already around the jar, bend the wire up and twist so that it is looped around the wire circle. Then go back and twist a small loop in the large arch so that it will hang securely from the shepherd's hook. You will probably need needle-nose pliers to finish the job. My hands got tired after a while and my dear hubby finished them for me. You could easily embellish the jars by adding ribbon, fabric or beads around them.


Embroidered Handkerchiefs: I made these for my mother, Robert's mother, my sister/Maid of Honor, and myself. These handkerchiefs were $2 each at Hobby Lobby. Lightly pencil the words you would like to embroider. Use an embroidery hoop to stitch over the stencil (if you don't know how to embroider, pick up a book on it; it's easy!). Iron smooth. Voila!


Flower Girl Crown: They had these available in white at Hobby Lobby, but my flower girl's dress was ivory, so DIY to the rescue! I started with very thin wire and wrapped it loosely once around my flower girl's head to get a measurement. Then, I looped the wire around another two or three times to make it sturdy. I wrapped the wire in white floral tape to bind the wire together and add strength. Then, I wrapped each flower around the wire. I faced them all the same direction and alternated type of flower, but that is up to you. Once all the flowers were attached, I wrapped thin, sheer white ribbon around the wire between each flower. Then, I tied two large bows with wide sheer ribbon and hot-glued the bows together at the knot, and hot-glued the bows to the back of the crown. I used a thin ribbon to tie over the bow knots and wire where it was hot-glued to make it look cleaner and add stability. She loved it, and it was so precious!


Country Chic Table Setting: Okay, so the arrangements were made by my florist, but the rest of the centerpieces were all me. Well, us. I bought all of the mason jars at Walmart and filled the little ones with salt and one tea candle (keep the boxes they come in and put the lids back on them after they're filled for easy transportation). My dad cut the beautiful, raw slices of wood. I bought about 60 yards of blue satin and cut and hemmed them into square table cloths. The table numbers are wooden numbers from Hobby Lobby painted with crackle spray paint and hot-glued to a wine cork base (I'm realy proud of these because I thought of them all on my own while on pain killers after having my wisdom teeth removed). The dishes and linens were rented, but we folded the napkins ourselves 2 days before the wedding.


Place Cards: I wanted to make my guests feel special, like they had a special spot waiting just for them, so I made everyone a place setting. I saved up corks for months and cut a slit down the side of each one (carefully!). The hardest and most tedious part was typing up everyone's names, spacing them correctly, and cutting them all to the same dimensions. It was tricky. Then, I inserted the card into each cork. I suggest using card stock (mine was pearlescent, of course), so that it will not bend when inserted. And of course, I had to make one for me with my new name!

"I Spy" Camera Game: This was something to entertain my guests during the reception if they got tired of dancing or the toasts were boring. Robert's parents bought the cute cameras, but I made the cards. This is the only picture I have, so I apologize for the poor visibility. There were 3 different versions of cards, 5 of each for the 15 total tables. They all had this poem at the top:
"Use your camera and look around,
Hunt for pictures that need to be found!
Shoot away to complete the list,
Find moments photographers may have missed!"
They all had things to photograph such as "Mother of the Bride crying," "The Cutest Old Couple," "The Bride and Groom Kissing," "Groomsmen Dancing," etc. I chose 4 fonts and alternated them. I used blue and lavender scrapbook paper to layer beneath the ivory paper to make the cards prettier and sturdier. The game was a big hit!


Custom Cocktail Napkins: I used the same logo I designed to order a custom rubber stamp. I then bought "Stayzon" brand blue ink and stamped each lavender disposable cocktail napkin with the logo. 400 napkins later, we had enough for drinks, cake, and cookies, and no one forgot whose wedding it was or what day it was!


Ceiling Decor: Although I didn't make the paper lanterns, I assembled them myself, including a battery powered tea light inside. I used small strips of duct tape to attach a loop of thin wire to the tea lights, which were then turned on and hung inside the lantern on a hook in the frame. It gave a lovely flickering glow throughout the evening. Fishing line was also tied to the inner frame of the paper lantern and then tied to beams on the ceiling. I also bought 70 yards of lavender tulle to drape along the beams. The bejeweled branches belonged to the venue, but it is basically a bundle of branches tied together with crystal drop beads tied on at varying lengths.

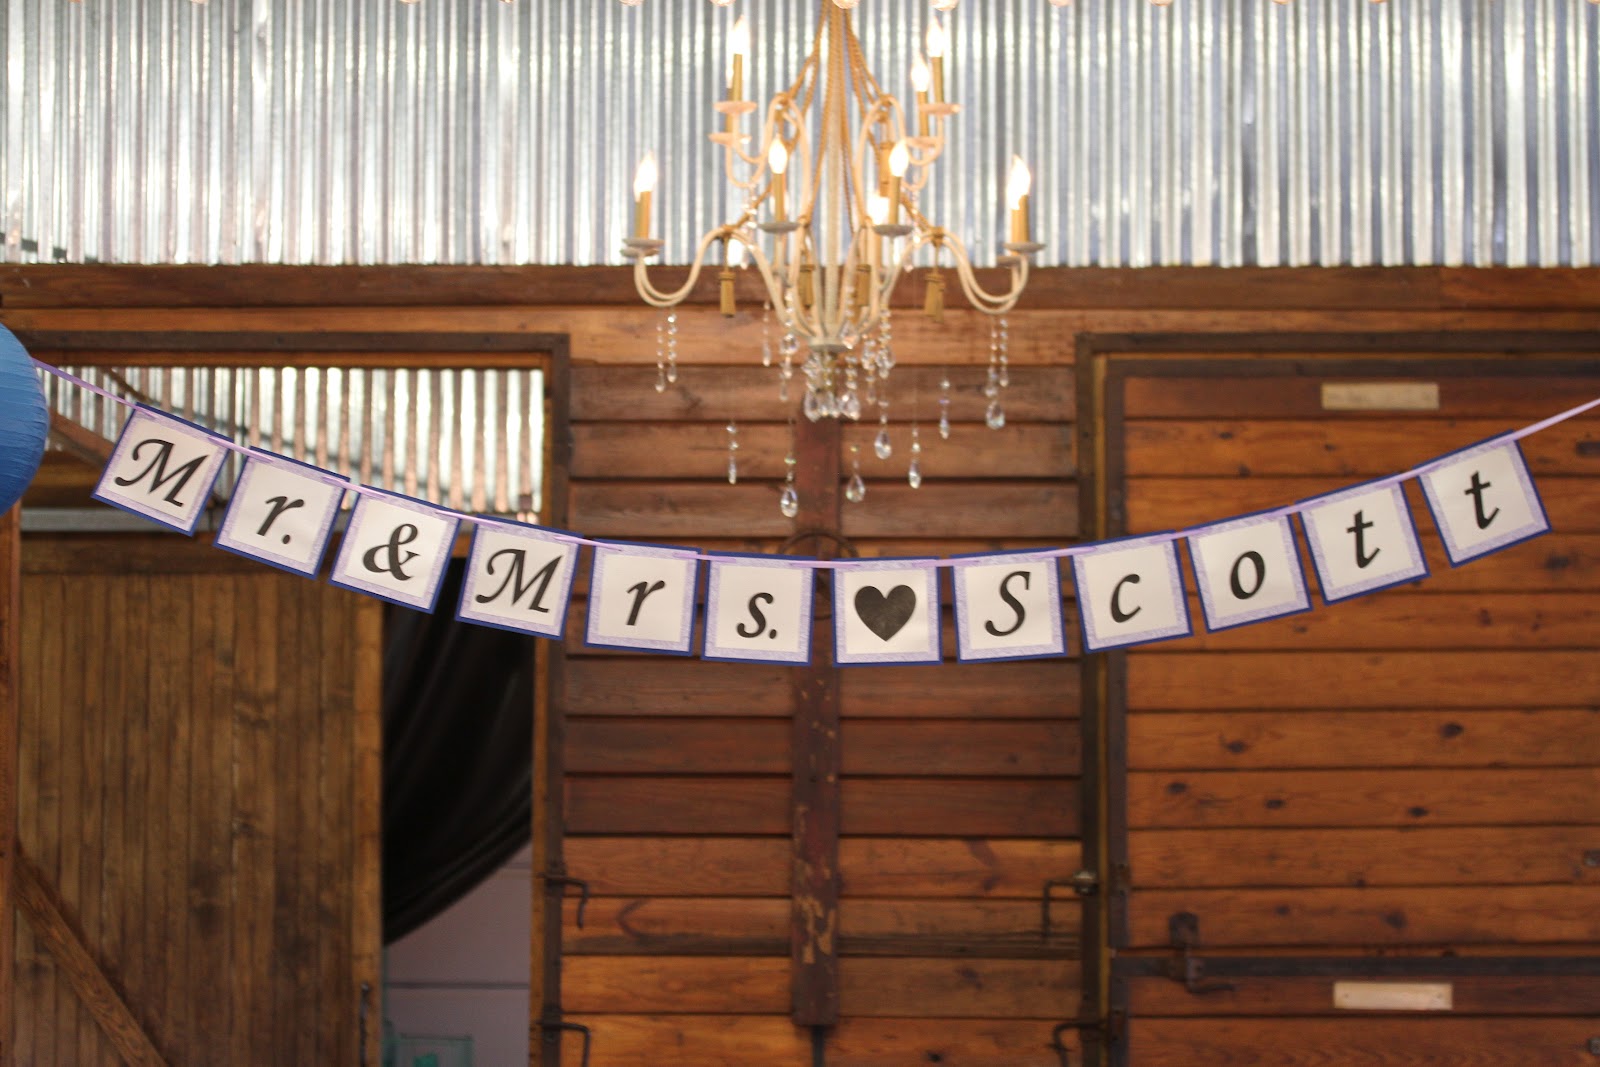
Banner: I made this banner similarly to the way I made the I Spy cards. I printed out large letters on the pearlescent cardstock, then cut them in squares. I backed them with blue and lavender scrapbook paper. I punched holes in the middle of each square (measuring the distance to make them all even and consistent). Then I threaded a long lavender ribbon through the holes connecting all the letters so that it would read "Mr. & Mrs. Scott." The heart was just for fun. :) I made another that said "Love Is Sweet" for the cookie bar.

.JPG)
Lyric Picture Frame: I made this to be displayed at the reception with an engagement picture of us in it, but now it hangs in our home with a picture of us during our first dance. The lyrics are from the chorus of our first dance song, "Then" by Brad Paisley. I bought a wooden frame at a craft store, and painted it white. I typed out the lyrics using different fonts, cut them out, and arranged them on top of the frame. I glued them to the frame, then Mod Podged the entire surface. Once it had dried, I painted the blue and lavender embellishment to dress it up a little. It's like having a moment frozen in time.
.JPG&description=Lyric%20Picture%20Frame "Pin It")

Thank You Sign: This is another idea I am very proud of because I didn't get it from anywhere but inside my head. We took this picture that day, and I used it to order our "Thank You" cards from Vistaprint with this as the front cover. After the photo, we set it on the gift table to be displayed. I bought the wooden sign from Hobby Lobby, painted it with the crackle spray paint, used a pencil to stencil the "Thank You" based on a font found in Word, and painted over the stencil with black acrylic paint.

 |
| Blue and lavender wedding details |

I will hopefully be able to flex my creative muscles again soon with some projects for my home. Thank you for bearing with my mini wedding obsession, and I hope that maybe I've inspired you to make your own wedding your own one-of-a-kind celebration of love.
No comments:
Post a Comment